Canvas 2D Graphics
Web Based Programming - CMP4011A
Dr. David Greenwood
Contents
- The
canvaselement - The rendering context
- Drawing shapes
- Sprites
- Animation with
requestAnimationFrame - Responding to events
Documentation
Further reading
Eloquent JavaScript has a chapter on the canvas element.
<canvas>
Canvas element
A canvas is a single DOM element that contains a image.
- Does not preserve shapes such that they can be moved or resized.
- The only way to move a shape is to clear the canvas and redraw it.
Canvas element
<canvas width="150" height="150"></canvas>- Two optional attributes: width and height.
- Can be set using DOM properties.
- Default values are 300 wide 150 high.
Canvas element
- A new canvas is transparent and shows as an empty space in the document.
- The element can be sized by CSS, but during rendering is scaled to fit its layout size.
- If the CSS sizing doesn’t respect the ratio of the initial canvas, it will appear distorted.
Canvas element
<canvas width="150" height="150">
  display this text if the browser
  does not support HTML5 canvas
</canvas>- Fallback content is placed between the open and closing tags.
- The closing tag is required
- …else all subsequent content is ignored.
Canvas element
<!DOCTYPE html>
<html lang="en">
<head>
    <meta charset="UTF-8">
    <link rel="stylesheet" href="style.css">
    <script src="script.js" defer></script>
    <title>HTML Canvas</title>
</head>
<body>
    <canvas id="canvas"></canvas>
</body>
</html>Canvas API
The Canvas API provides a means for drawing graphics using JavaScript and the <canvas> DOM element.
Canvas API
We can use the canvas for:
- animation
- game graphics
- data visualization
- image manipulation
- real-time video
The rendering context
The <canvas> element creates a fixed-size drawing surface that exposes a rendering context.
The rendering context
We will use the 2d rendering context.
The rendering context
There is also a 3D rendering context: WebGL
This has many powerful features, including access to the graphics hardware, and openGL like shaders.
We will not cover the 3D context in this lecture.
The rendering context
const canvas = document.getElementById("canvas");
const ctx = canvas.getContext("2d");
You create a context with the getContext method on the <canvas> DOM element.
The rendering context
Access the Canvas API via the ctx object.
You should inspect the context object in the console.
console.log(ctx)The rendering context
console.log(ctx)You will see current values for all the attributes, and if you expand the CanvasRenderingContext2D field you will see the many methods available.
Drawing
Drawing
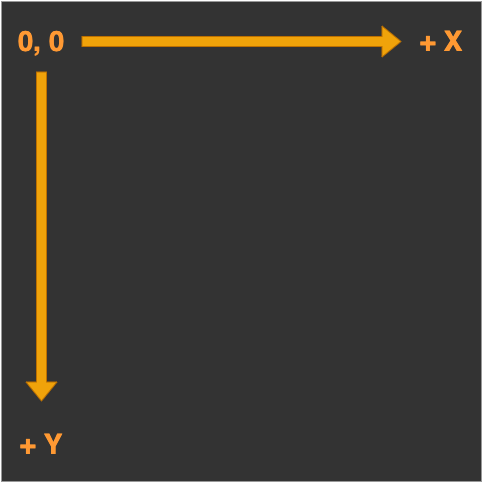
The rendering context has a coordinate system which, by default, places the origin at the top left corner of the canvas.
Each unit of length is 1 pixel.
Drawing
Canvas supports two primitive shapes: rectangles and paths.
A shape can be filled, meaning its area is given a certain colour or pattern, or it can be stroked, which means a line is drawn along its edge.
Drawing
There are three functions that draw rectangles on the canvas:
 fillRect(x, y, width, height)
 strokeRect(x, y, width, height)
 clearRect(x, y, width, height)
Drawing
 fillRect(x, y, width, height)
 strokeRect(x, y, width, height)
 clearRect(x, y, width, height)
The parameters are the same for all three functions:
x, ydefine the top left corner- then we have width and height
Drawing
The colour of the fill, thickness of the stroke, and so on, are not determined by an argument to the drawing method, but by properties of the context object.
Drawing
ctx.fillStyle = "red";fillStyledefines the fill appearance.- Set to a string that specifies a colour.
- Uses the same colour notation as CSS.
Drawing
ctx.strokeStyle = "blue";
ctx.lineWidth = 5;strokeStylespecifies the colour of a stroked line.- Width is set by the
lineWidthproperty. lineWidthmay be any positive number.
Drawing
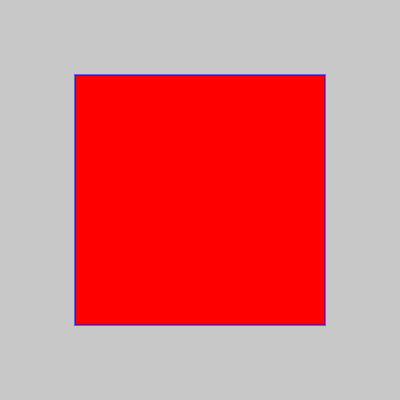
const x = y = 75
const w = h = 250
ctx.fillStyle = "red"
ctx.strokeStyle = "blue"
ctx.fillRect(x, y, w, h)
ctx.strokeRect(x, y, w, h)
Paths
A path is a sequence of points, connected by segments of lines that can be of different shapes, of different width and of different colour.
Paths
It is possible to build any complex shape using a combination of the path tools.
Paths
Paths are not values that can be stored and passed around.
- You must make a sequence of method calls to describe its shape.
Paths
- Each segment created with
lineTostarts at the path’s current position.
- The current position is usually the end of the last segment.
- Or, it is the position passed to
moveTo.
Paths
When filling a path:
- Each shape is filled separately.
- A path can have multiple shapes.
- The path needs to be closed.
Paths
If the path is not already closed, a line is added from its end to its start.
The shape enclosed by the now completed path is filled.
Paths
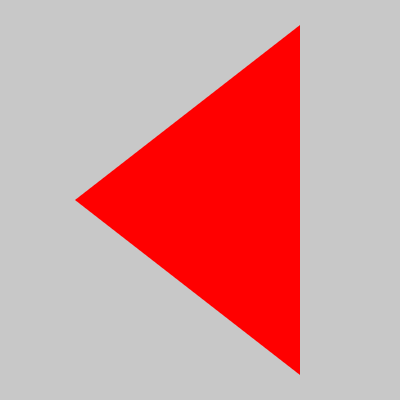
ctx.fillStyle = "red"
ctx.beginPath()
ctx.moveTo(75, 200)
ctx.lineTo(300, 375)
ctx.lineTo(300, 25)
ctx.fill()Curves
A path may also contain curved lines.
- These are a bit more involved to draw.
Curves
Complex curves and shapes can be drawn using Bezier and quadratic curves. We wont cover these functions for now.
quadraticCurveTo()bezierCurveTo()
But you should know that they are available.
Curves
To draw circle segments we use the arc functions.
arc(x, y, radius, startAngle, endAngle, counterclockwise)arcTo(x1, y1, x2, y2, radius)
Curves
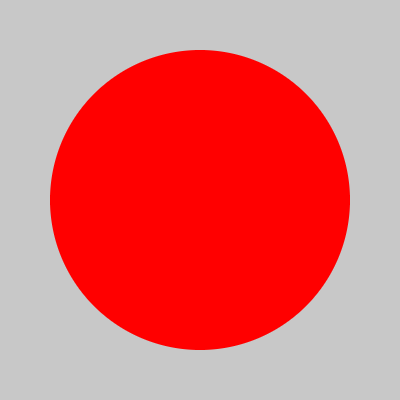
ctx.fillStyle = "red"
ctx.arc(200, 200, 150, 0, Math.PI * 2)
ctx.fill()
Text
The canvas rendering context provides two methods to render text:
fillText(text, x, y [, maxWidth])strokeText(text, x, y [, maxWidth])
Text
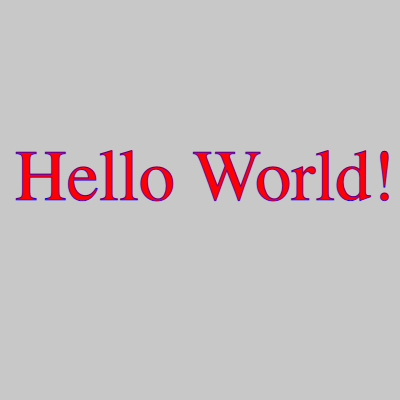
const text = "Hello World!"
const x = 15, y = 200
ctx.fillStyle = "red"
ctx.strokeStyle = "blue"
ctx.font = '72px serif'
ctx.fillText(text, x, y)
ctx.strokeText(text, x, y)
Sprites
Bitmap graphics
Images for computer graphics are usually in one of two categories:
- Vector graphics
- Bitmap graphics
So far we have been working with vector graphics - where we have specified shapes with lines and curves.
Bitmap graphics
Bitmap graphics don’t specify shapes but work with pixel data.
Pixel data defines values on a regular 2D grid.
Bitmap graphics
The drawImage() method allows us to draw pixel data onto a canvas.
This pixel data can originate from an element or from another canvas.
let img = document.createElement("img")
img.src = "img.png"
Bitmap graphics
However, if we just call drawImage(), it is unlikely to display the image as we expect.
let img = document.createElement("img")
img.src = "img.png"
ctx.drawImage(img, 0, 0)
Why is this?
Bitmap graphics
It is essential to ensure the image resource is loaded before drawing.
Bitmap graphics
const canvas = document.getElementById("canvas")
const ctx = canvas.getContext("2d")

let img = document.createElement("img")
img.src = "img.png"

img.addEventListener("load", () => {
  ctx.drawImage(img, 0, 0)
});Bitmap graphics
In addition to the previous example, the drawImage() method can take two further arguments:
drawImage(image, dx, dy, dWidth, dHeight)- this lets us scale the image.
Bitmap graphics
The drawImage() method also has a nine argument version which lets us specify the source rectangle:
drawImage(image, sx, sy, sWidth, sHeight, dx, dy, dWidth, dHeight)s*define the source rectangle.d*define the destination rectangle.
Sprites
Sprites are two-dimensional images included in a larger scene.
- Often used for animation.
- Multiple poses can be stored in one image…
- a sprite sheet
Sprites
![]()
Storing all the image frames in a single file is often preferred for compression efficiency.
Sprites
![]()

The ability to select a source rectangle allows us to render a section of the entire sheet.
Sprites
- Source rectangle is
41,0,40,29 - Destination is
200,100,120,87 - We have “cut out” a region of the sprite sheet and placed it on the canvas.
- The canvas respects the alpha value of the source image.
Sprites
consider this source code:
const sw = 40, sh = 29
const dw = 120, dh = 87

sprite.addEventListener('load', () => {
  ctx.drawImage(sprite, 0, 0, sw, sh, 50, 100, dw, dh)
  ctx.drawImage(sprite, 41, 0, sw, sh, 200, 100, dw, dh)
})
what does this code do?
Sprites

We have cut out two regions of the sprite sheet and placed them on the canvas.
Sprites
Here is the Idea…
Draw one image, then draw another image in the same place.
Animation
Animation
requestAnimationFrame()
- Tells the browser that you wish to perform an animation.
- Requests that the browser calls a callback function.
- The callback updates an animation before the next repaint.
Animation
requestAnimationFrame()
A callback is a function passed as an argument to another function.
- The callback function is always passed a timestamp.
- The timestamp gives the milliseconds since the page was loaded.
Using a callback function
You will write the callback function:
function myCallBack(timestamp) {
  console.log(timestamp)
}

requestAnimationFrame(myCallBack)
Using a callback function
You will notice that we get only one value printed to console.
- We need to call
requestAnimationFrame()again to get the next value. - and again…
- and again…
Recursion
We do this using recursion
function myCallBack(timestamp) {
  console.log(timestamp)
  requestAnimationFrame(myCallBack)
}

myCallBack()- we moved
requestAnimationFrame()into our callback
Recursion
We make a call to our function, to start the recursion.
function myCallBack(timestamp) {
  console.log(timestamp)
  requestAnimationFrame(myCallBack)
}

myCallBack()
Recursion
How often does the callback function get called?
1396.32
1412.986
1429.652
1446.318
1462.984
1479.65
1496.316Using a callback function
Often we want to do something after a period of time has passed.
- Store the previous time globally and compare it to the current time.
- Check if the enough time has passed in our callback.
Using a callback function
let prevTime = 0

function myCallBack(timestamp) {
  if (timestamp - prevTime > 500) {
    prevTime = timestamp
    console.log(timestamp)
  }
  requestAnimationFrame(myCallBack)
}

myCallBack()
Using a callback function
Now we get this sort of output:
514.689
1031.335
1547.981
2064.627
2581.273
3097.919
3598.031Animation
Instead of logging to console, we could draw our image on the canvas.
Animation
Store some global variables.
let prevTime = 0
let frame = 0
Animation
Write a draw function.
function draw(frame, x, y) {
  let sx = 41
  if (frame === 0) sx = 0
  ctx.clearRect(0, 0, canvas.width, canvas.height)
  ctx.drawImage(sprite, sx, 0, 40, 29, x, y, 120, 87)
}Animation
Finally, we call our animate function.
function animate(timestamp) {
  if (timestamp - prevTime > 500) {
    prevTime = timestamp
    frame = (frame + 1) % 2
  }
  draw(frame, 100, 50)
  requestAnimationFrame(animate)
}

animate()Animation
![]()
We now have our sprite’s frames drawn alternately.
Events
Formally, an event is a message sent from the browser to a JavaScript function, for example:
- mouse clicks
- key presses
- window resizes
Events
Informally, we can describe events in our animation that require some sort of response, such as collision detection in a game.
Keyboard Events
const KEYS = {}

document.addEventListener("keydown", (event) => {
    KEYS[event.code] = event.type === "keydown"
})

document.addEventListener("keyup", (event) => {
    KEYS[event.code] = event.type === "keydown"
})Keyboard Events
To check if a key is pressed, we can read the KEYS object.
if (KEYS['ArrowLeft']) x -= 1
if (KEYS['ArrowRight']) x += 1Collision Detection
Often we want to know if two objects are touching, or overlapping.
- game characters
- frame boundaries
- UI elements
AABB Collision Detection
What is an Axis Aligned Bounding Box (AABB)?
AABB Collision Detection
An AABB is the smallest rectangle that encloses an object and is aligned with the axes of the coordinate system.
- the left and right edges of the AABB are parallel to the x-axis
- the top and bottom edges of the AABB are parallel to the y-axis
AABB Collision Detection
compare two objects with x, y, width and height properties
function AABB(a, b) {
  if (a.x > b.x + b.w) return false
  if (a.x + a.w < b.x) return false
  if (a.y > b.y + b.h) return false
  if (a.y + a.h < b.y) return false
  return true
}AABB Collision Detection
You could consider a variation of this method to check if an object is within the bounds of the canvas.
Radial Collision Detection
Radial collision detection uses Pythagoras’ theorem to determine if two objects are touching.
If the squared sum of the radii is greater than the squared distance between the centres, then the objects are colliding.
Radial Collision Detection
compare two objects with x, y and radius properties
function radial(a, b) {
  let radii = a.radius + b.radius
  let dx = a.x - b.x
  let dy = a.y - b.y
  return radii * radii > dx * dx + dy * dy
}
Collision Detection
Once we have detected a collision, we can respond…
Summary
- The
canvaselement - Drawing shapes
- Sprites
- Animation with
requestAnimationFrame - Events
- Collisions
See you in the labs!